Understanding Depth Maps
How 2D images become 3D masterpieces.
The Core Concept
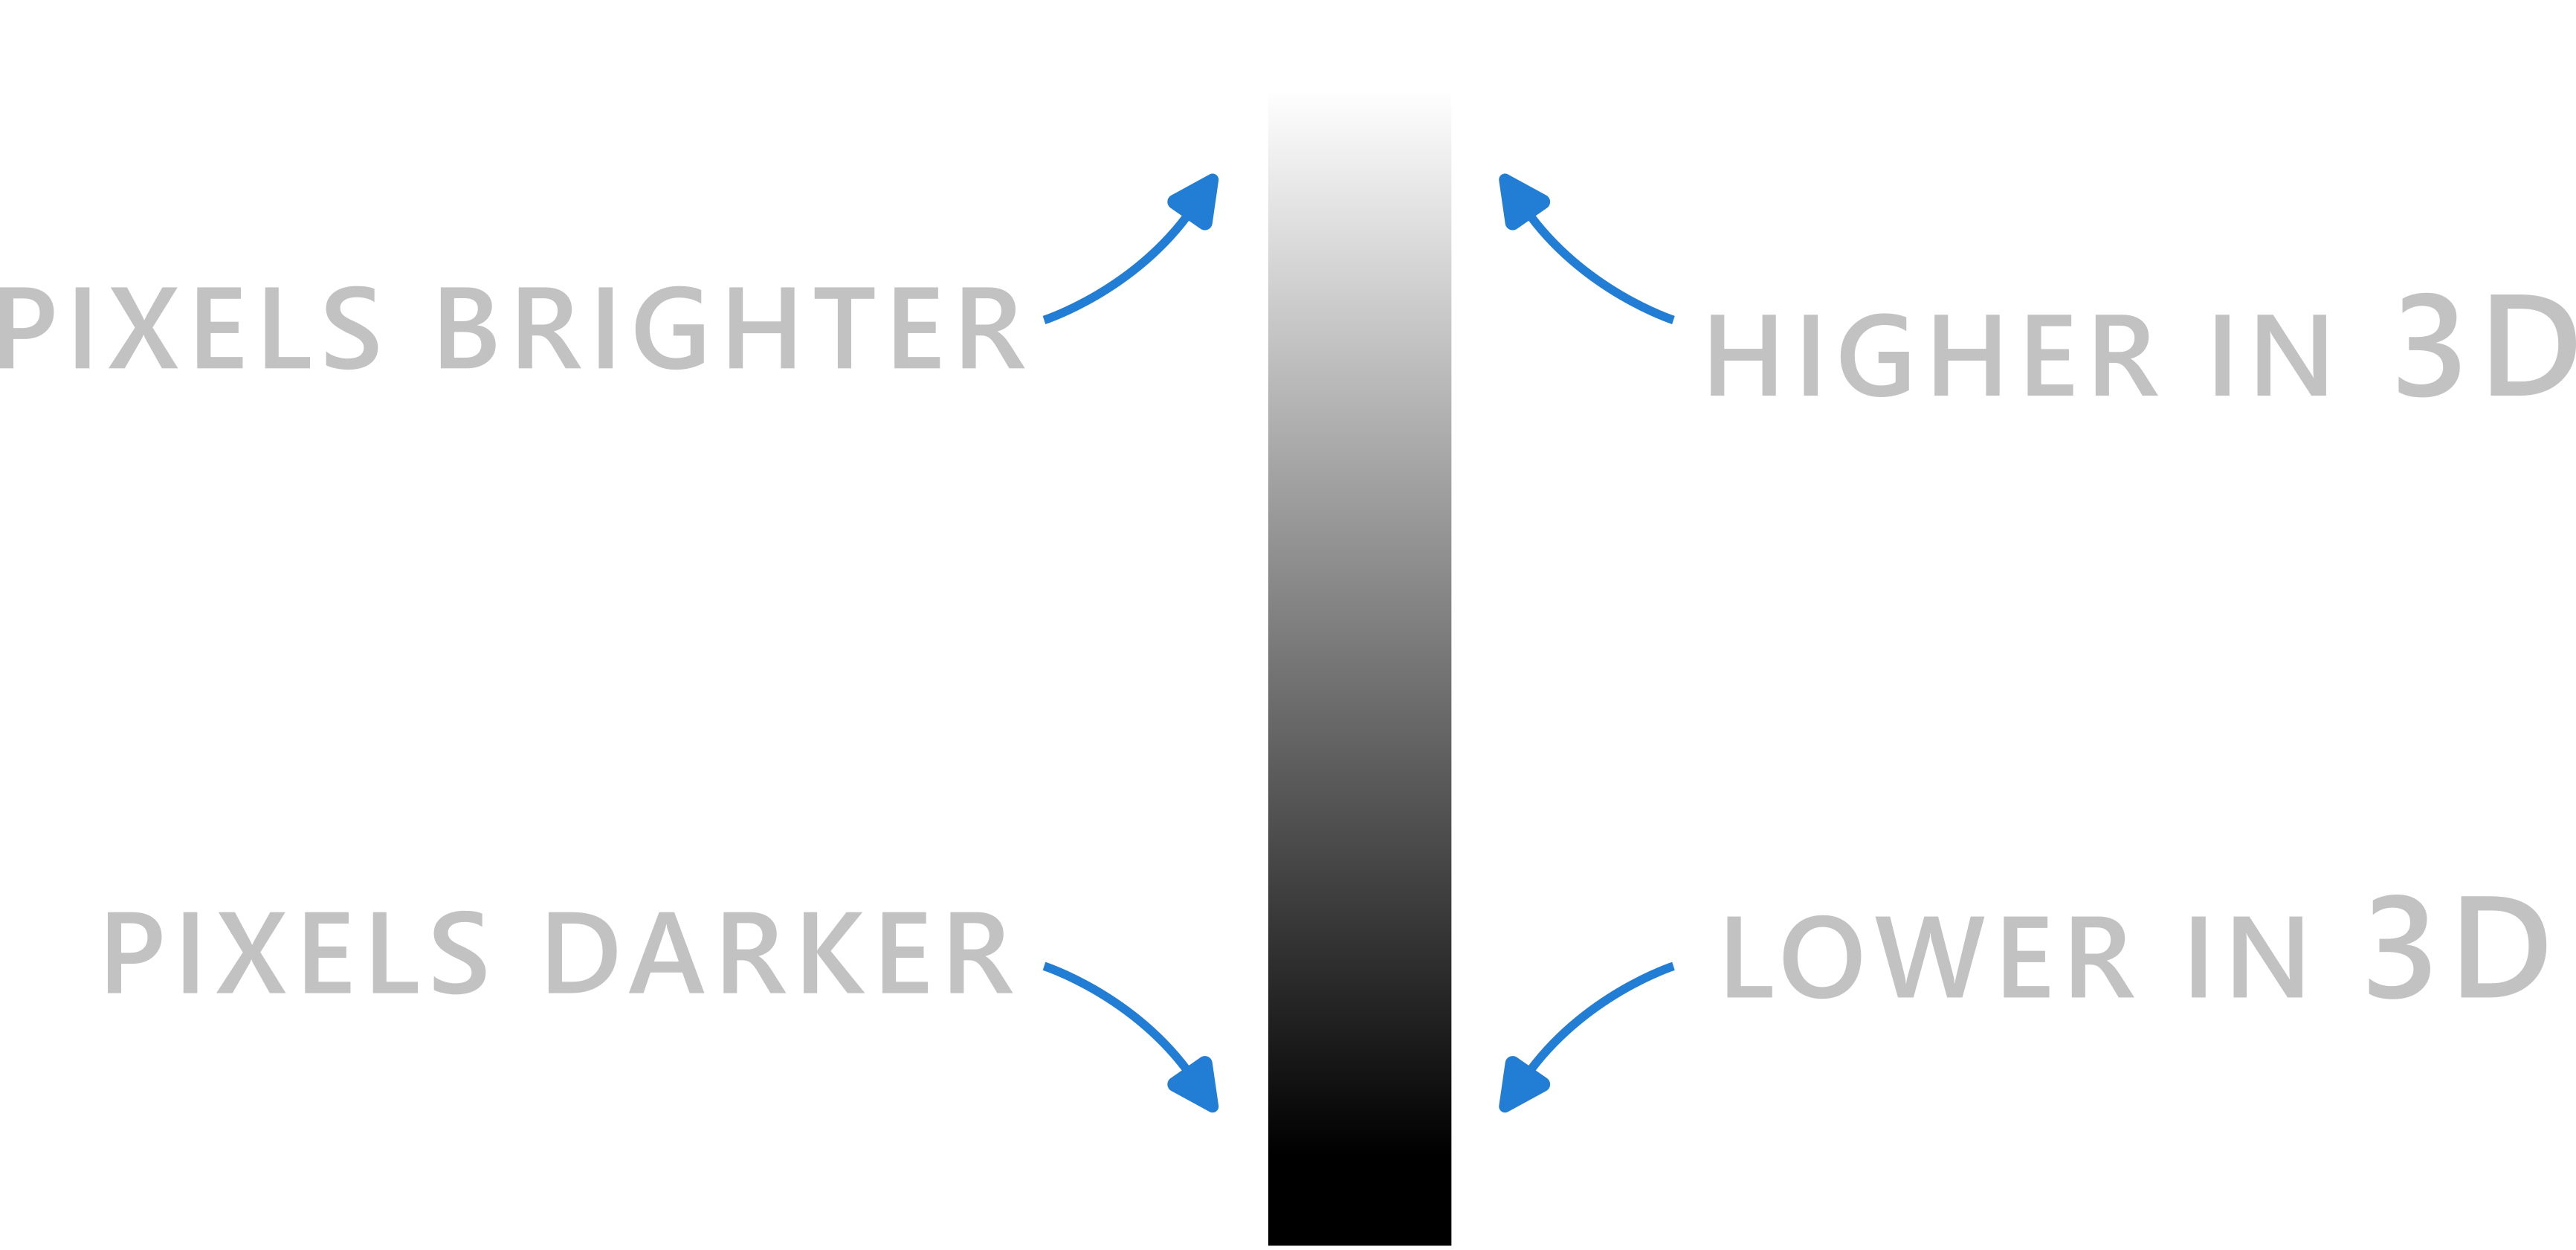
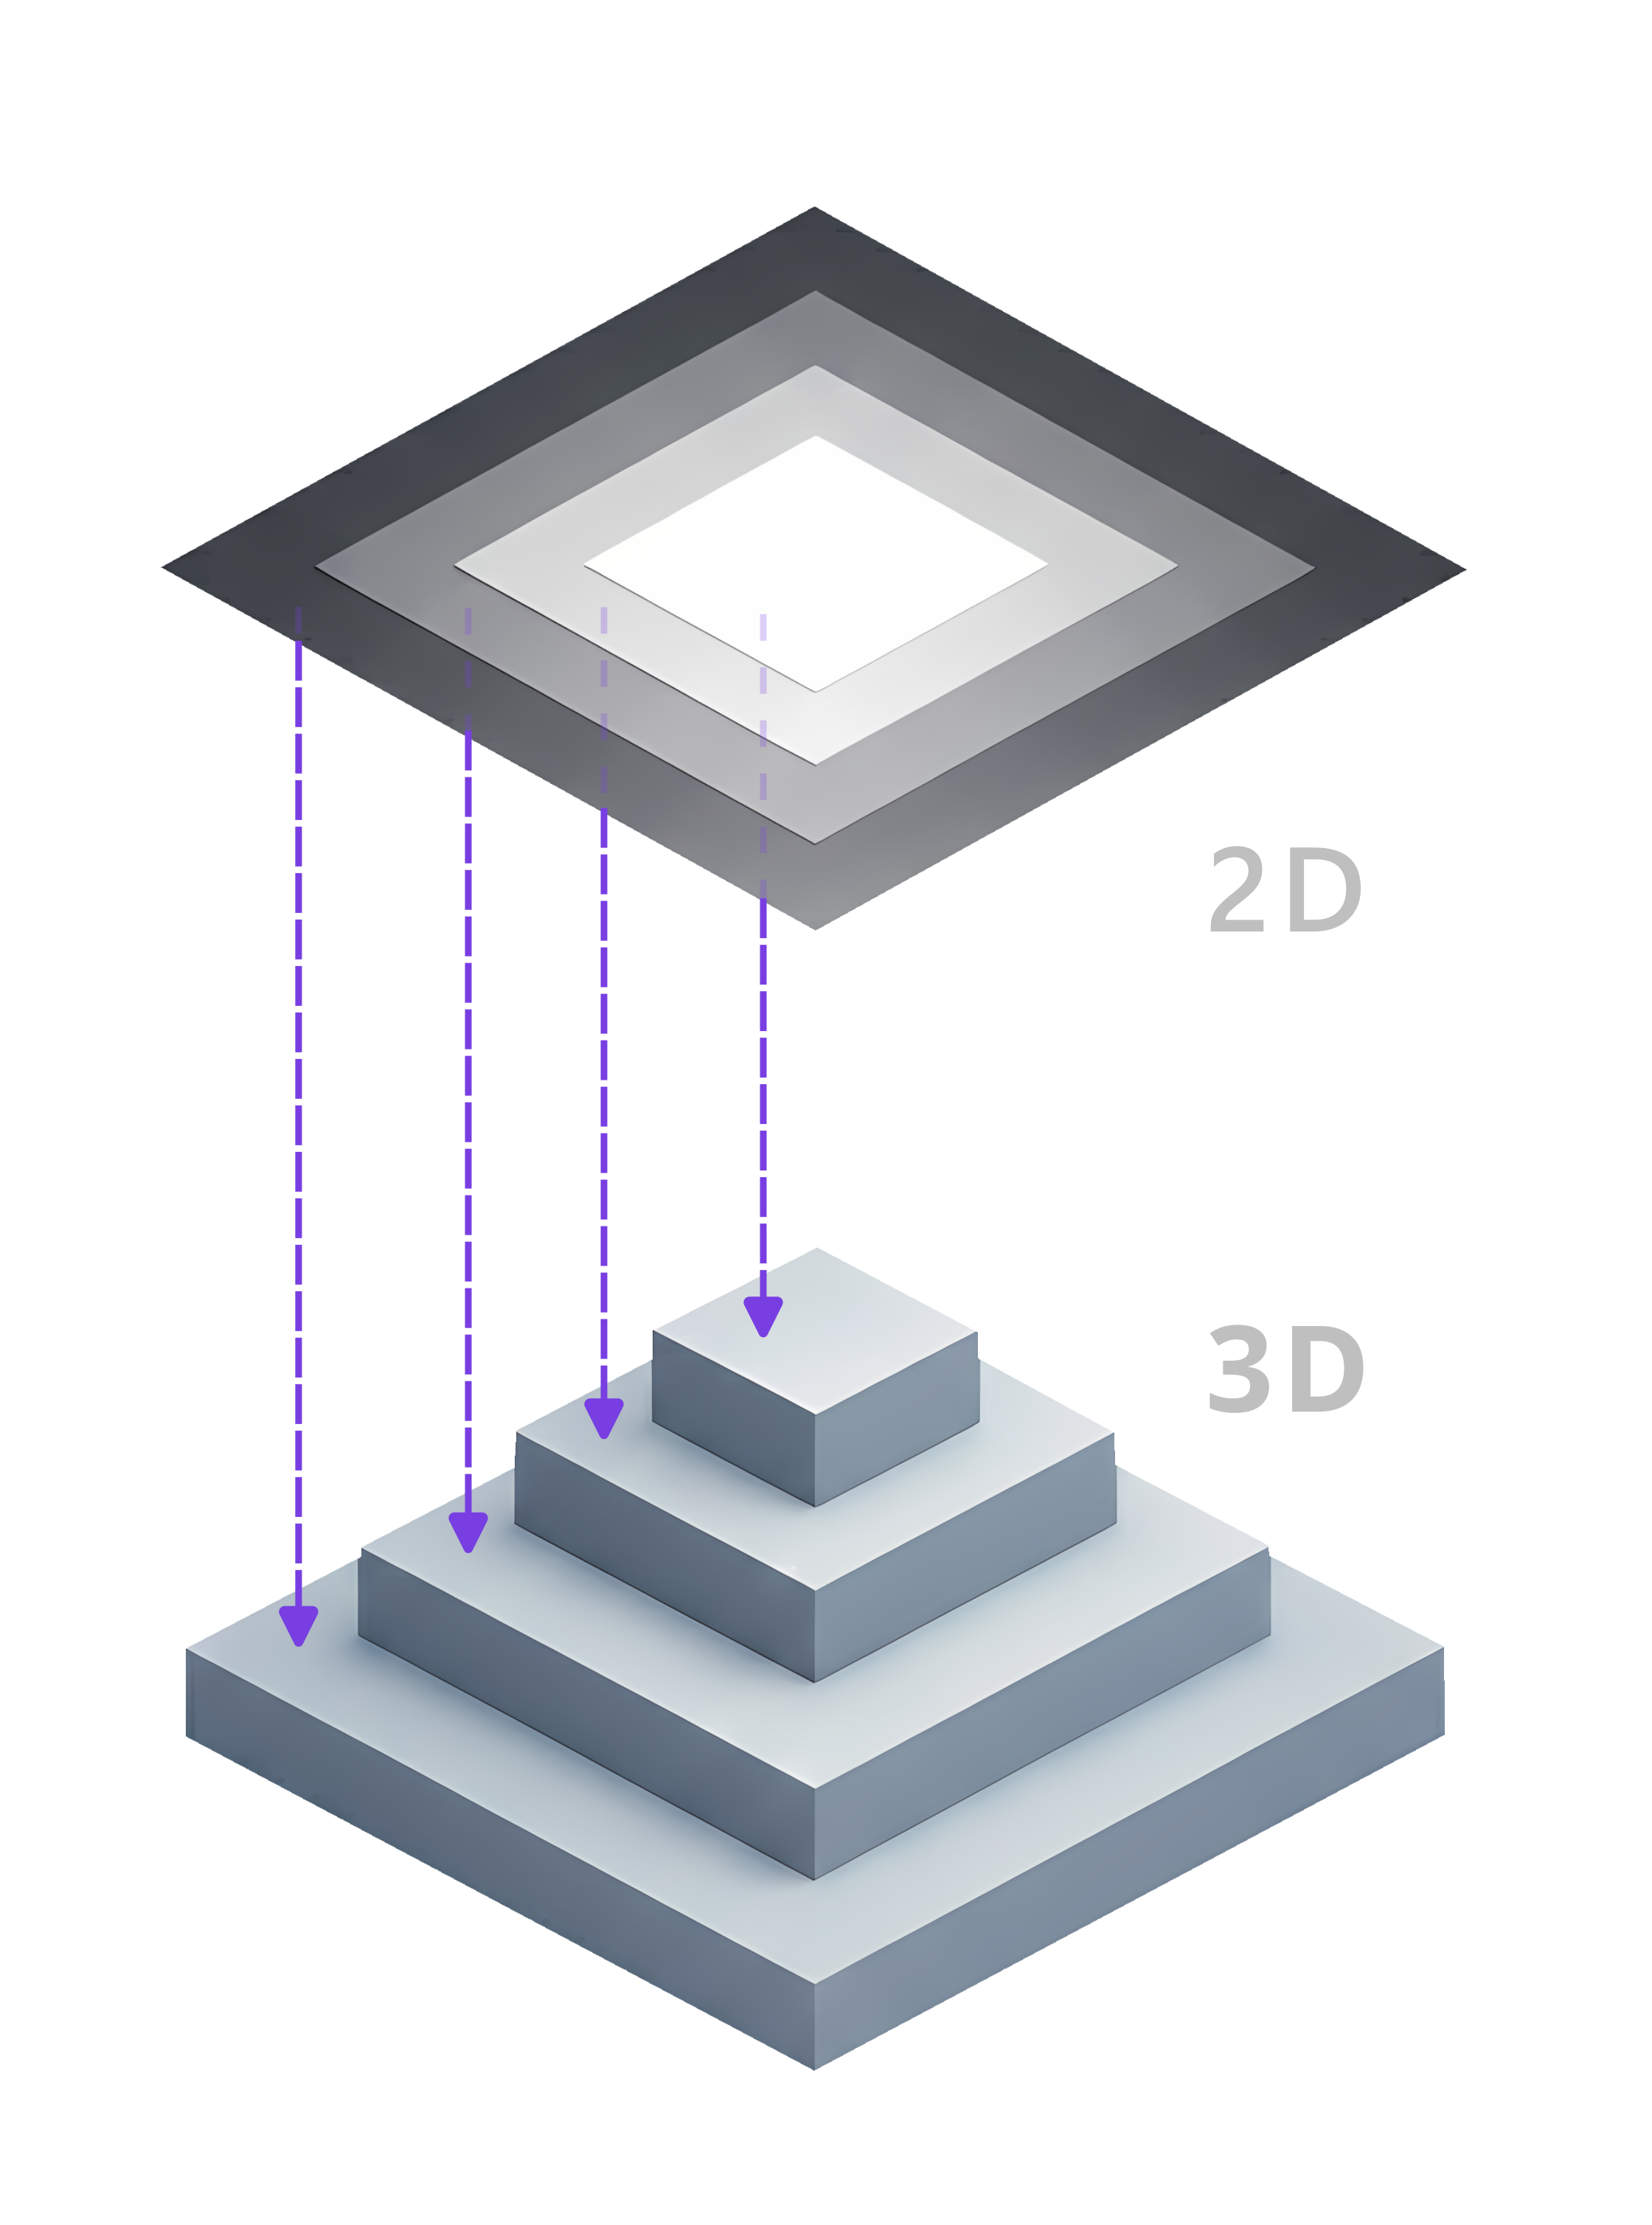
A depth map is a grayscale image where the brightness of each pixel represents its height in 3D space. Think of it as a topographical map for your CNC or 3D printer.
The beauty of depth maps lies in their simplicity: a single image file contains all the 3D information needed to create stunning reliefs, textures, and sculptures. No complex 3D modeling required—just upload and carve!
- • White Pixels: Maximum height (The "peaks")
- • Black Pixels: Minimum height (The "valleys")
- • Grays: Everything in between
Pixel to Physical
When your software reads a depth map, it looks at the numerical value of every pixel (0 to 255). Each value is translated into a specific Z-axis coordinate, creating smooth gradients or sharp steps.
The software interprets these values based on your machine's capabilities. For example, a value of 255 might translate to 5mm of depth on one machine, or 10mm on another. This scaling is typically adjustable in your carving or printing software.
Pro Tip: Most CNC machines handle depth maps at 1024×1024 pixels or smaller without issues. Larger images can be resized without significant quality loss for most applications.
From Image to 3D
This technology allows us to capture incredible detail from digital art and turn it into tangible objects you can carve, print, or touch.
Whether you're a hobbyist creating custom gifts or a professional producing intricate designs, depth maps open up a world of creative possibilities without the need for complex 3D modeling skills.
Practical Applications
CNC Carving
Create intricate relief carvings, signs, and artistic pieces from depth maps. Perfect for woodworking, signage, and decorative items.
3D Printing
Generate detailed 3D models for printing. Depth maps can create bas-relief sculptures, terrain models, and textured surfaces.
Laser Engraving
Use depth maps to create multi-tone engravings with varying depths, adding dimension and depth to your laser projects.
Artistic Creations
Transform digital artwork into physical objects. Great for gifts, memorabilia, and custom designs.
Tips for Best Results
Start with High Contrast
Images with clear light and dark areas work best. Adjust contrast in photo editing software before converting to a depth map.
Use Appropriate Resolution
Higher resolution means more detail. For CNC carving, 300-600 DPI is typically ideal. Match resolution to your machine's capabilities. 1024×1024 pixels is typically fine for most projects and works well with standard CNC machines.
Test with Small Samples
Always do a test carve or print on scrap material first. This helps you fine-tune depth settings and avoid mistakes on your final piece.
Consider Material Properties
Different materials (wood, acrylic, metal) respond differently to depth. Adjust your depth map intensity based on what you're working with.
Common File Formats
PNG
Lossless, best quality
JPG
Smaller files, widely supported
BMP
Uncompressed, precision work